Being plant-based in a carnivorous world is heavy. Have you ever looked at a rental property, opened the oven and wished you hadn’t? Who knows what was cooked in there to cause such a blackened lavarock mess at the bottom? No thanks! One instance in particular was our last rental, a studio in the Yorkville neighborhood of Manhattan directly south of Spanish Harlem, the kitchen was not much bigger than a broom closet with no counter space. The biggest concern was the set up: the oven was butted-up directly against the outside wall, that seemed like a huge safety issue (fire hazard!!!). And the studio by stovetop alone got ridiculously hot in the summer. For people who like to cook and eat (especially cake) that was a real bummer, so we had to make-do and improvise.
ecoRDN collected a sizable stack of dairy-free dessert recipes over the years, long before we went plant-based in our diet. We ate cottage cheese and eggs but became interested in less heavy desserts. Vegan desserts were a healthier option and more of a culinary challenge, which we have always welcomed. The idea of modifying the recipes for our rice cooker didn’t seem daunting, and if it worked we’d have our cake and eat it to (along with keeping cool during the blistering Manhattan summers).
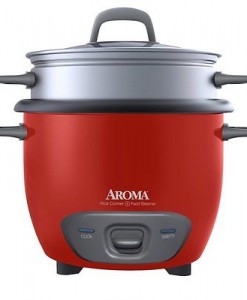
Taken from the Aroma® FAQ page

Q: How does a rice cooker work?
A: All Aroma rice cookers will produce perfectly cooked rice if properly used. All “on-off” or “cook-hold” rice cookers work on the same principle. An inner pot sits on a heated plate that brings water in the pot to a boil. The water boils vigorously until it is absorbed by the food, or boils off as steam. A temperature sensor in contact with the pan senses once the temperature has risen above that of boiling water and reduces the heat to “keep-warm,” which keeps the contents of the pan at the proper serving temperature without burning.
Since there is no boiling point in batter the rice cooker won’t cook fully from beginning to end, after a few minutes the cooker switches from cook to warm, so after trial and error we figured out how to make our #CakeHack work. We added the batter to the oiled inner pot, hit cook and set the timer for 15 minutes. The sensor switched to warm after a few minutes but we waited until the timer counted down. Then we repeated the process: hit cook and set the timer for 15 minutes. Doing this 4 times makes one-hour, the appropriate cooking time. After “cooking” we left the cake sit covered on the warm setting for 30 minutes. Unplug the cooker, remove the inner pot from the rice cooker and sit aside without lid to cool. You want to make sure the cake is fully cooled as this will help it to release from the pot, trying to do so while the cake is hot could result in sticking, breaking and/or a ruined cake.
Recipe:
Chocolate Banana & Walnut Rice Cooker Cake
Wet Ingredients-
- 2 large frozen bananas (thawed)
- 1 cup soy milk
- 2 Tbsp vinegar
- 1/2 cup sugar
- 1 Tbsp high heat oil
Dry Ingredients-
- 1/2 tsp salt
- 1 cup cocoa powder (unsweetened)
- 1 1/4 cup whole wheat flour
- 1/4 tsp baking soda
- 1 tsp baking powder
- 1 cup chopped walnuts
Tools-
- 4 cup rice cooker
- 2 cup liquid measuring cup
- Set of dry measuring cups and spoons
- Heat resistant silicone spatula
- 2 medium size mixing bowls
- Flour sifter
- Whisk (a fork works too)
- Whisk soy milk and vinegar together in liquid measuring cup and set aside.
- Plug the rice cooker in to start preheating.
- Coat the bottom and sides with the oil when warm.
- Sift all dry ingredients except flour and walnuts into one of the bowls.
- Add the flour in with the sifted ingredients and stir together.
- Measure out the walnuts and save for later step.
- Mash the banana in the second bowl then mix in the sugar and vinegar soy milk.
- Combine wet and dry ingredients into one bowl.
- When wet and dry ingredients are fully incorporated fold in the walnuts.
- Pour batter into rice cooker, hit cook and set the timer for 15 minutes.
- Follow #CakeHack description above
- When done do what you do to a normal oven-baked cake (ice it, decorate it, eat it, etc.)
- Enjoy!
© 2015-2016 ecoRDN
Great post! Love using appliances for novel ideas except what the are meant to use.
LikeLike
Thanks! Multi uses for one tool is a win!
LikeLiked by 1 person
Thank you for this idea. I have Aroma rice cooker too http://cooker.guru/aroma-arc-753sg-review. So I think i’ll try your recipe in nearest future
LikeLiked by 1 person
Awesome! Let us know how it turns out!
LikeLike